I finally replaced my horrible home-made internal battery and audio board with TA7MNA’s one.
⚠️ 2025-11-16 — improved version with better BMS and PowerDelivery/QuickCharge charging module ⚠️
The last time I told you about my QMX+, it was to show you the protective covers I had 3D printed, and in one of the photos you can see a switch that goes through the back panel.
The following photo shows you the thing that was hidden inside the metal case. It worked pretty well, but I was afraid of a bad connection ruining the device.
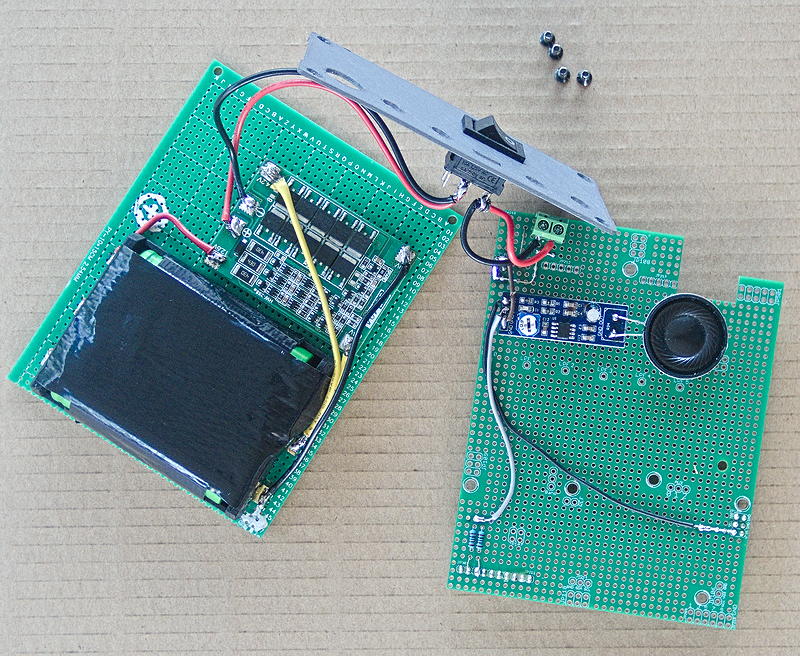
Before
I finally ordered the electronic boards from the QMX Plus Battery and Audio Board project, but I made some small modifications:
the USB charging port doesn’t support PD, which is very annoying,
there is no switch, and I’ve had to manually turn off the power several times because it was impossible to do so from the front panel for some reason.
So I replaced the fuse holder with two wires that lead to a power switch that can be operated from the rear panel, and I added a PD-compatible electronic circuit (affiliate link) that bypasses the original USB connector.
I set the PD trigger module to request 9V from the power supply because it is compatible with PowerDelivery 2, PowerDelivery 3, and QuickCharge 2.
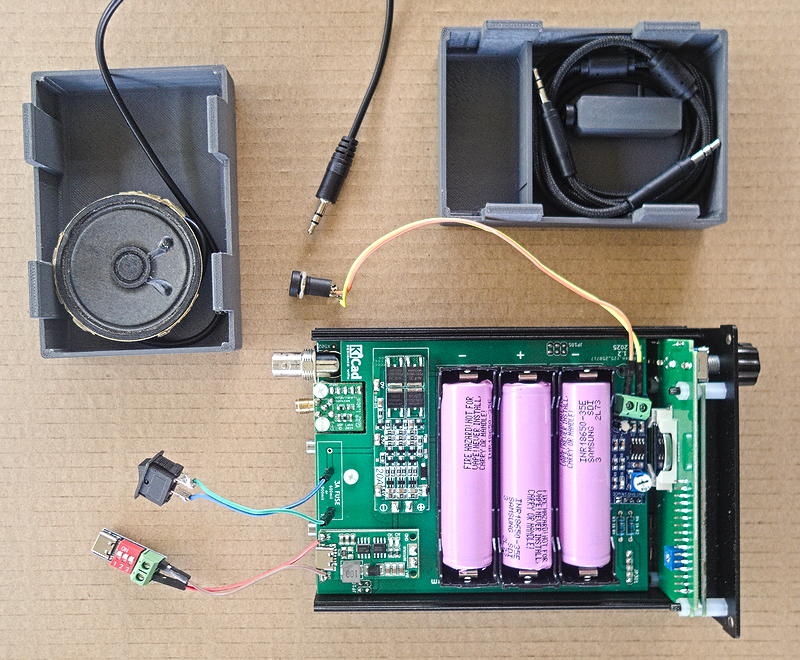
After (since the photo was taken, the electrical wires have been replaced with thicker ones)
I still need to redo the back panel with three more holes than the original:
one for the USB-C PD port,
one for the power switch,
and one for an amplified audio jack, as I want to put a speaker in the back cover that I created in the previous article. I find the sound from the internal speaker too muffled.
The only thing that really bothers me about the TA7MNA design is that it uses a very limited BMS that probably doesn’t balance the charge of the three batteries effectively. Maybe a good reason to learn how to use KiCAD myself :-)
⚠️ 2025-11-16 — improved version with better BMS and PowerDelivery/QuickCharge charging module ⚠️