How to put a Meshtastic node in a car with an external antenna, but without drilling the roof? Hold my beer.
It would have bothered me to make holes in the roof of my almost new car to fit a Meshtastic node, but I had to install two antenna for my quite ambitious project based on a Lilygo T-Beam and a solar panel. There are already antennas at the rear of the roof for the infotainment system: FM broadcast reception, GSM and GNSS. The last two are no longer in use, as the navigation system is obsolete, I thought I’d wire the GPS antenna to the T-Beam. Then I had to think about the ISM antenna (868 MHz).
I dug around (a lot) on the Internet to find car roof bases designed to add antennas, but either it was too expensive for my budget, or I had to sacrifice the FM reception. I don’t make much use of it, but I was embarrassed to do without the RDS and trafic info in case of problems on the road.
So I had to add an antenna. Without making holes, because that poses several problems: risk of corrosion, leaks, and something to explain when resolding the car.
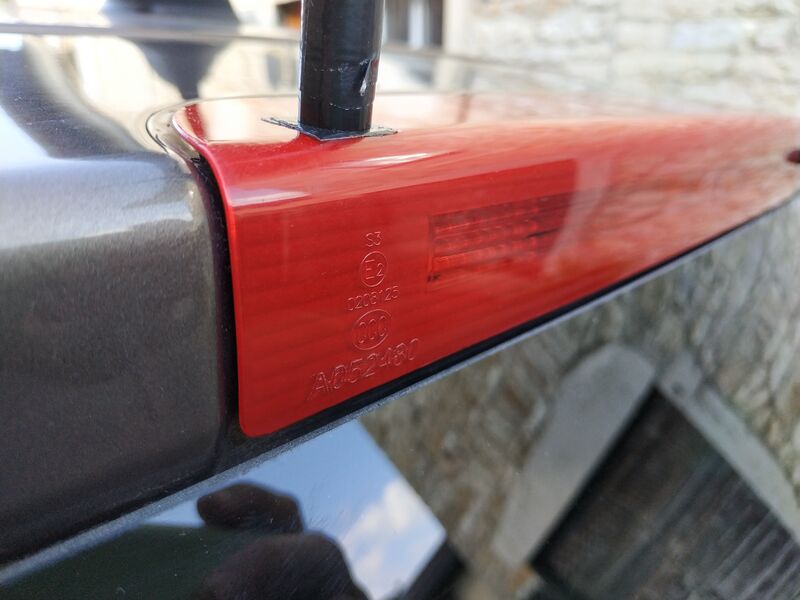
Almost by chance I came across a video of a guy installing an antenna (like me) on his car (like me), without making a hole (ha!) with a commercial but ingenious solution (not like me). The trick is to take advantage of the third brake light. It is easy to drill thru the light cap. I managed to disassemble it and saw that there was room for a connector on the left side, but no room on the right side because of the windscreen washer nozzle.
Well… I was embarrassed to drill such a hole in my central light cap without a safety net. So I went to a classifieds website to see if there were any light caps for sale. By an incredible coincidence, someone was selling the exact model for my car at a cheap price because the LED strip was broken: €20! Instant purchase.
As it happens, the item was in perfectly new condition. Broken but new. The LED strip is easy to change between the caps. Nice, I will drill my original cap, dirty and scratched, and keep the brand new one in case of a drilling accident, or to replace the old one when I resell the car.
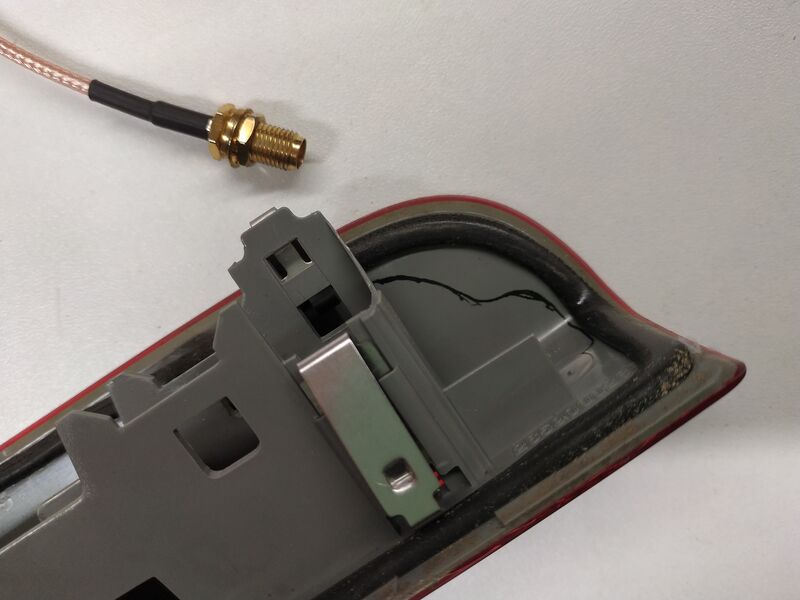
The usable zone for drilling is marked with a felt pen
The light cap is slightly larger than the opening in the door panel, so I draw the limits with a felt pen to know where to drill.
At first I wanted to use a T-Beam to take advantage of the GPS receiver, so I put the ceramic GPS antenna under the plastic of the cap. I haven’t abandoned this idea, but I’ve had to make some changes. The plan was to mount the two antennas in the light cap, but put the T-Beam and its power circuit in a side cabinet in the boot of the car.
I found a small MPPT controller that can use three sources of power: 5V possibly from a micro-USB socket, solar panel up to 21V from a terminal block, and 3.7V battery from a dedicated slot or JST connector. It allows the battery to be charged from the other two power sources and supplies a regulated voltage of 5V via a USB A connector.
I use a small 12V to micro-USB converter to act as a link between the car’s electrical circuit and the MPPT controller’s USB input.
I’ve got a 10 watt, 18 volt solar panel that I want to install under the roof glass over the rear seats. Why such a large panel, you might ask? The roof glass is treated to block most of the sun’s rays, and the sun’s rays that can be used to generate electricity are largely in the IR and UV range. I did a test: the efficiency of the solar panel under the roof glass is very poor (but I already knew that).
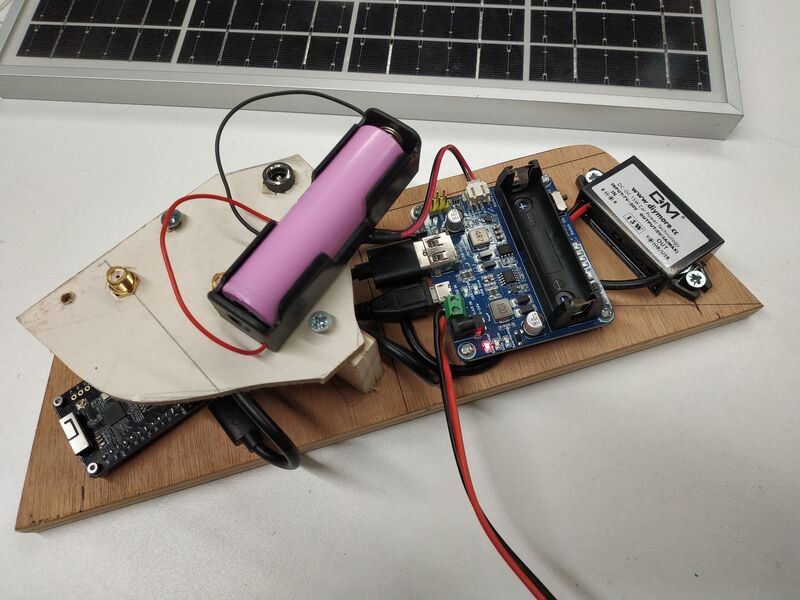
The original setup with the T-Beam and a solar panel
I’ve been racking my brains over a few questions. For example, I had to run two coaxial cables between the door and the body in the sleeves already packed, and solder four SMA connectors to the ends of these cables from inside the car, which seemed difficult for my poor soldering skills. These rather long cables would have caused a lot of attenuation in the transmission line, which is a bit bad for such a low power radio. And next, I had broken the T-Beam a bit when I tried to add a BME280, I fried a component and it doesn’t handle its battery anymore.
No more T-Beam, so no more GNSS receiver. So… I can use a T-LoRa (affiliate link) instead. So… I can probably put this smaller thing directly in the back of the light cap, as close to the antenna as possible. And no more SMA connectors to solder, I will use a very short cable I have on hand from a previous project. The SX1276 is less powerful than the SX1262, but this is compensated for by the shorter cable.
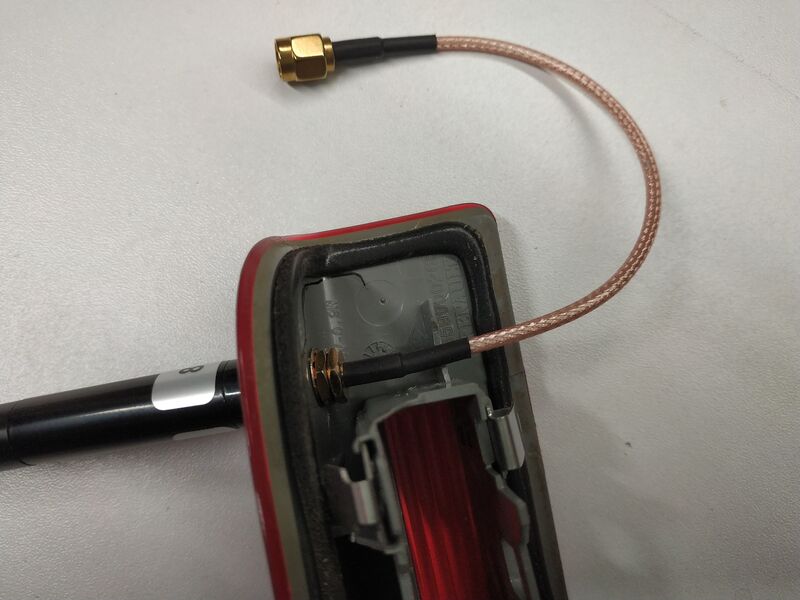
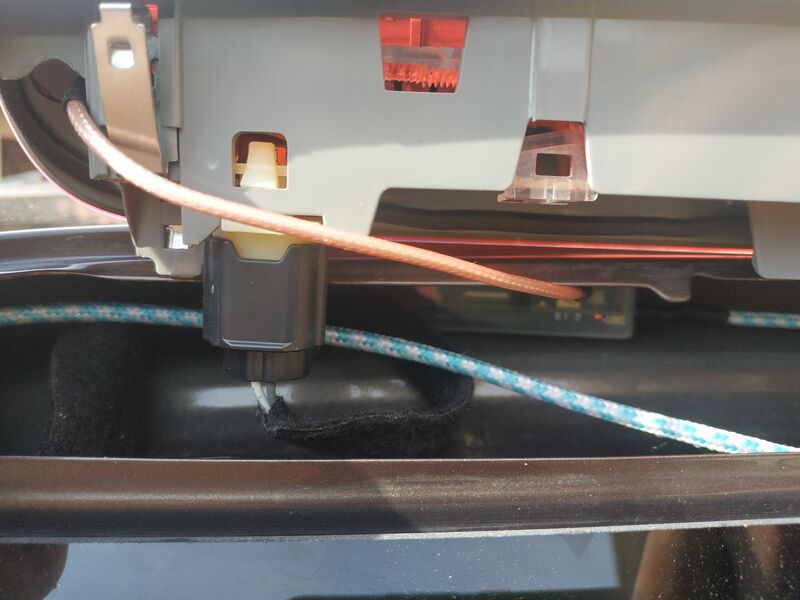
The antenna is screwed onto the through connector
To attach the T-LoRa to the inside of the door, I went for the simplest solution: I put it in its original transparent plastic box with holes for the SMA and USB connectors. In the lid I fixed a small neodymium magnet with gaffer tape. Not very pretty, is it?
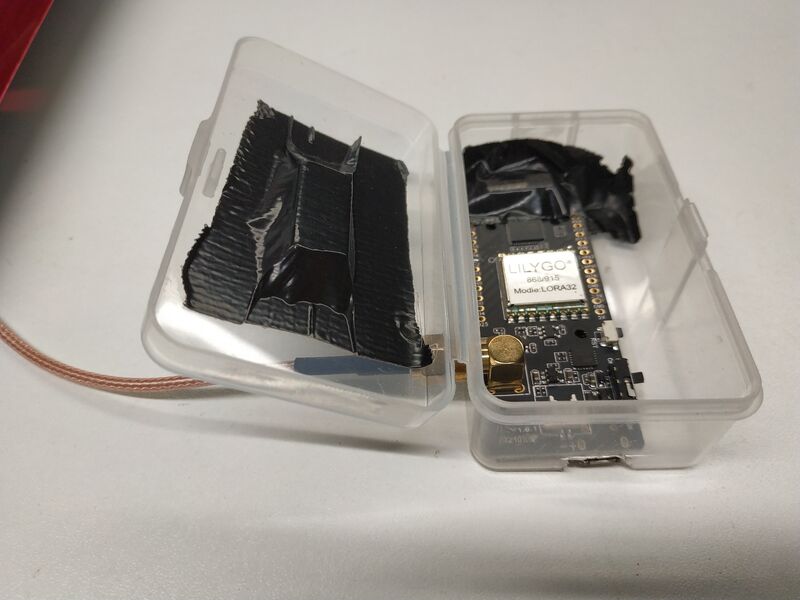
Lilygo T-LoRa in its box, magnet in the lid
Now I just have to wire a USB cable through the left sleeve of the boot door, close to the side cabinet and near the 12V accessory socket. I salvage a broken USB mouse cable, cut the wire next to the JST connector and thread it through the sleeve as best I can without damaging the other cables. I solder the cut end of the cable to a power-only micro-USB connector (two wires to solder only, on large pads). Pro tip: check that the colours of the wires correspond to the USB standard. My cable had the red (VCC) and brown (GND) wires reversed! Why? Why?
T-LoRa hidden behind the third brake light
I slide the plastic box into the empty space behind the lamp, there is plenty of room and the strong magnet holds it firmly in place.
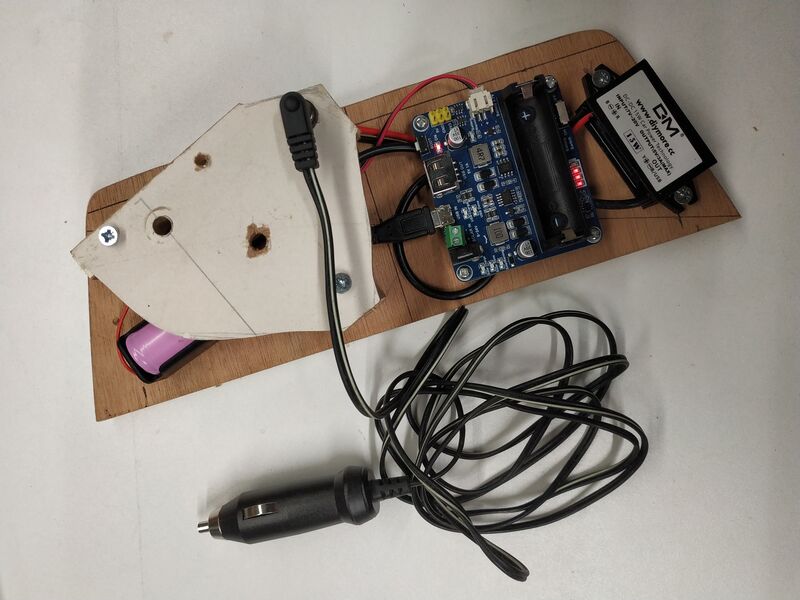
Power supply system
The other end of the USB cable is routed behind the trim at the rear of the car to the side cabinet. In this cabinet I put in the assembly I made for the T-beam. Since there is no T-beam anymore, the battery could take its place. The cable for the 12V plug comes out through the hatch used to change the bulbs in the left rear light. On this car, the accessory socket is supplied with power when the engine is running and then again 10 minutes after the engine has stopped.
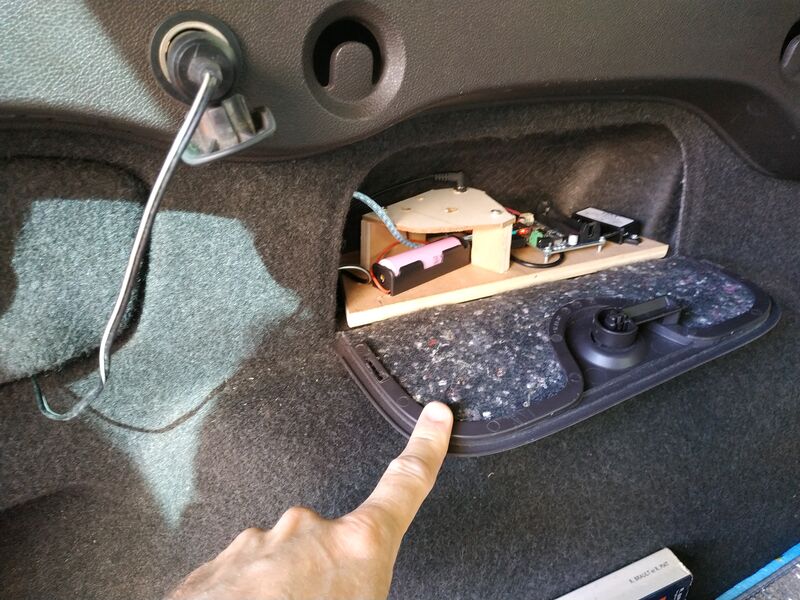
power supply in the side cabinet
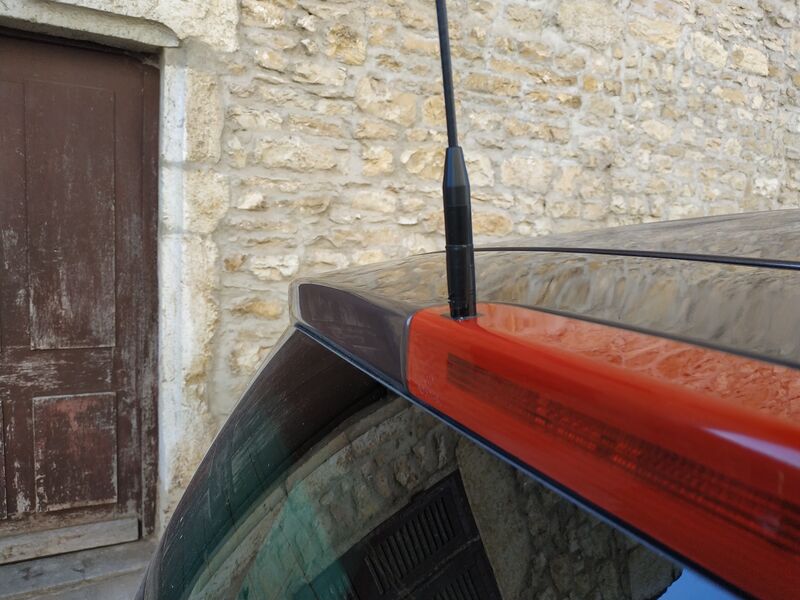
Once in place, a trained eye will immediately see that there’s something extra on the car, but for others it will go unnoticed :-) I put a piece of gaffer under the base of the antenna to seal the assembly, but it’s probably not enough!
868 MHz antenna integrated into the third brake light
Conclusion
I have a Meshtastic node that works while driving and for a few hours after the engine has been switched off.
What’s wrong
The USB cable is just for power. If I had a fully wired connector, I could also use it for firmware updates.
No geolocation, too bad.
It gets terribly hot under the sheet metal of this type of car in the slightest ray of sunlight (dark bodywork). I don’t know what it will do in the long term and I don’t have a thermometer to monitor it.
Watertightness is approximate. The simplest solution is probably to fit a rubber gasket to the base of the antenna and hope that the antenna itself is waterproof. Then there’s putty, but that’s uglier and less removable.
What can/will be improved
Use the solar panel. I’m going to make a bracket for it that will fit into the roof curtain rails. There’ll just be an ugly cable running from the corner of the panel to the nearest trim joint. With the solar panel, the node will probably be able to run 24/24 in the summer.
I found there was enough room for a T-Beam without its battery holder behind the third brake light, I didn’t think there was so much volume in the top of the boot door. For a mobile node, native geolocation (i.e. without a smartphone) is a big plus.